This is a multi-part article
You're reading part 1.
The context
Work on PyLMS has proved that the approach is viable enough to continue.
However, a CLI or a Desktop GUI are not the best to access the information I may store in the tool. Only my phone is (almost) always at reach when a "Lacune Mémorielle Sociale" (aka LMS) hits me.
I need an Android App, but I have never programmed one (I only looked at Android programming quickly many years ago).
Last Monday (today is Friday), I decided to create one, with the following goals and constraints:
- create a UI that demonstrates the feasibility of listing persons and filtering them by inputting text
- use state-of-the-art Android programming
- my phone is the only target
- demonstrate deployment on it
- demonstrate building APKs with Github Actions
- setup minimal quality control (with SonarCloud)
- refactor PyLMS repository to hold both PyLMS and the Android App
Disclaimer
This series describes what I did in less than 4 days, starting with zero knowledge on Android and Kotlin development, googling and reading my way toward a solution.
Any Android- and Kotlin-related statement reflects the knowledge acquired over that short period.
Of course, I'm skipping all the back and forth, tries and errors, and only describing the end result.
Install Android Studio
Android Studio (Koala Feature Drop at the moment) is THE IDE for Android Development.
I followed these steps to install it:
- download from Android Developers (direct link, skips the licence to skip the licence agreement screen)
- Unpack the
.tar.gzto an appropriate location (~/DEV/Android_Studioin my case)tar xvfz android-studio-2024.1.2.12-linux.tar.gz mv android-studio 2024.1.2.12 ln -s 2024.1.2.12 - Install i386 libraries because I run a 64-bit version of Linux
sudo apt-get install libc6:i386 libncurses5:i386 libstdc++6:i386 lib32z1 libbz2-1.0:i386 - Open terminal and launch Android Studio
~/DEV/Android_Studio/current/bin/studio.sh - Do not import previous Android Studio settings
-
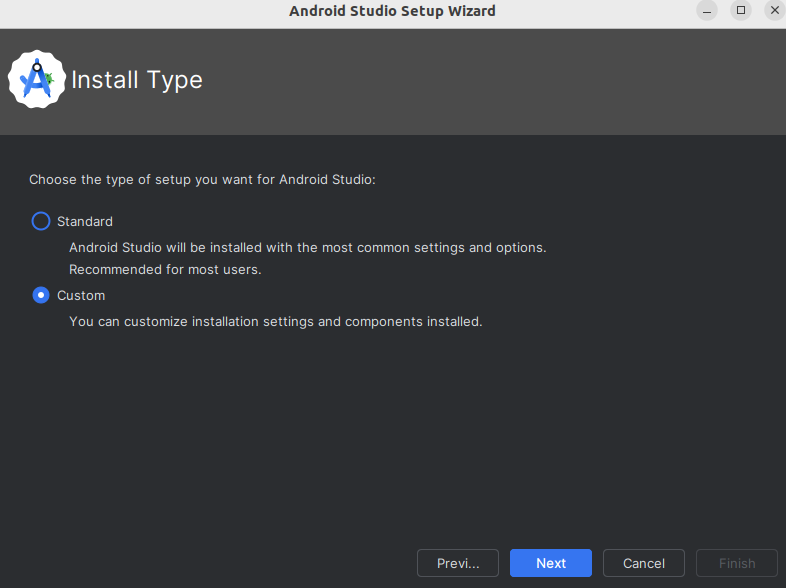
Complete the Android Studio Setup Wizard
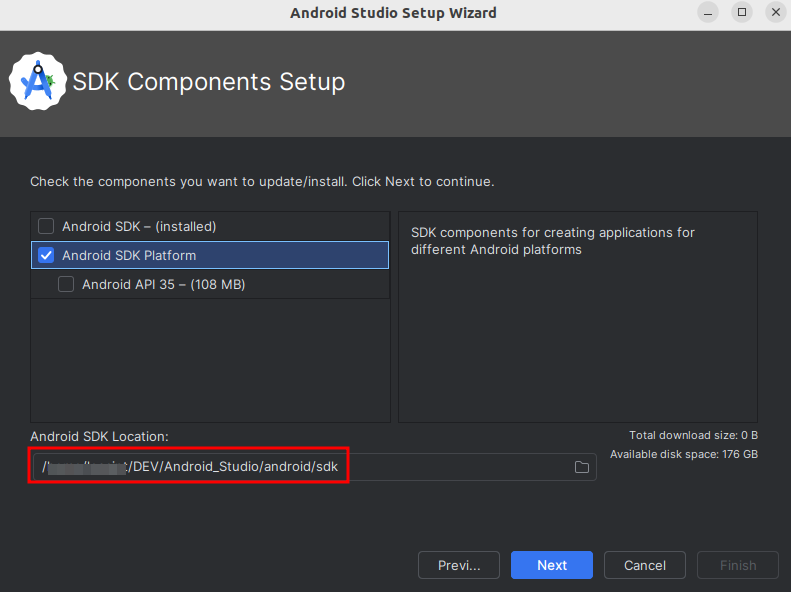
- I selected "custom install" but it would not let me install any other SDK than 35
- I selected
~/DEV/Android_Studio/androidas destination
-
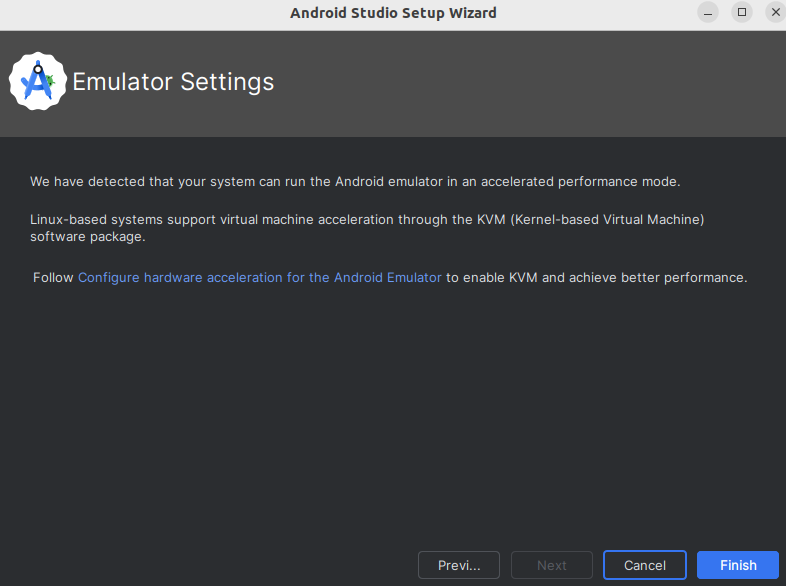
Wizard advised configuring hardware acceleration for the emulator (see Install Emulator Acceleration)
-
Create Desktop entry with
Tools > Create Desktop Entry... - Search
Android Studioin Gnome's application hub and add it to favorites
Sources
Install Android SDK
I checked Settings > About my phone > About software in phone, it runs Android 14.
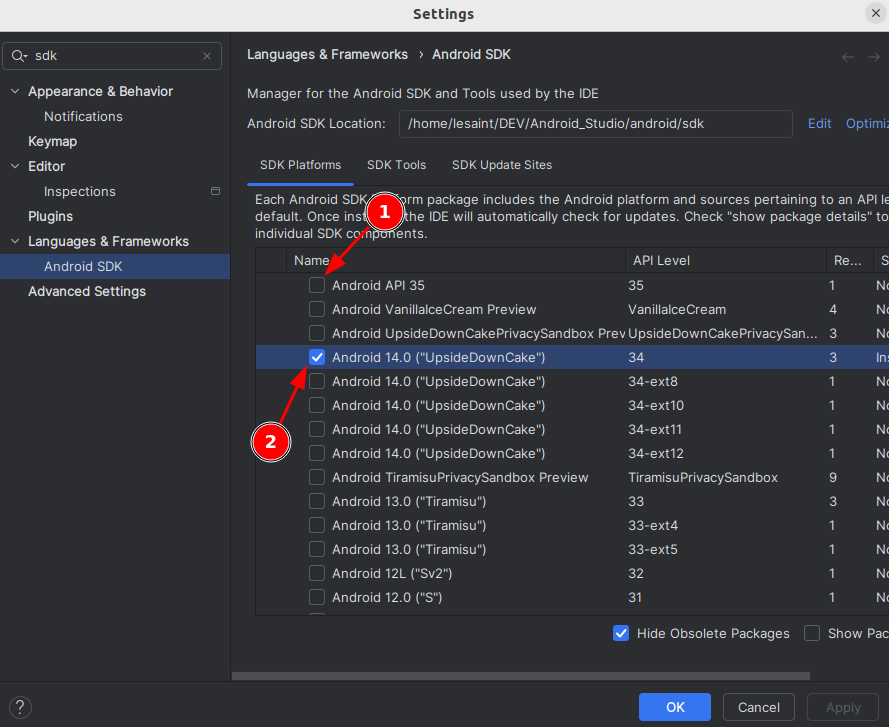
I need to install Android SDK Platform 34 package for Android 14.0 ("UpsideDownCake") and remove SDK 35.
- Open Settings with
File > Settingsand go toAndroid SDKs - Untick
Android API 35and tickAndroid 14.0 ("UpsideDownCake")with API Level34
Bootstrap an application
Use Android Studio File > New > New Project...:
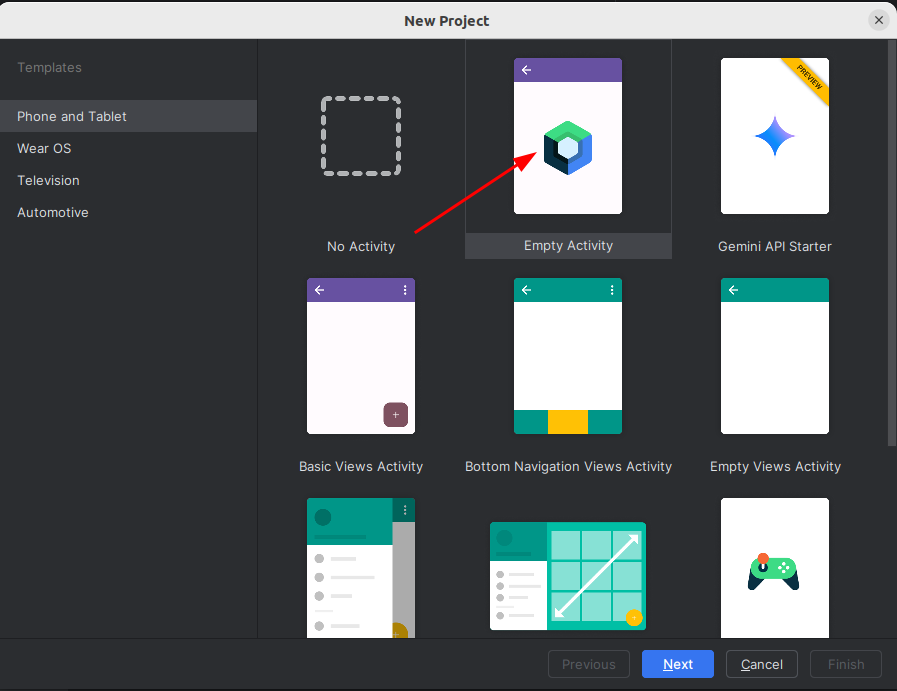
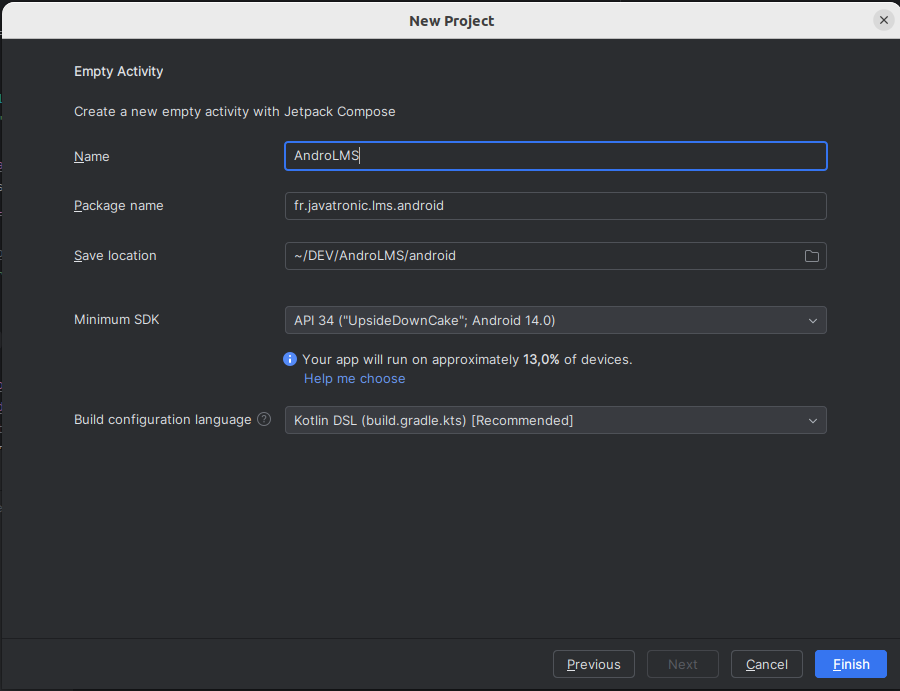
- select template
Empty Activity - Name:
AndroLMS - Package:
fr.javatronic.lms.android
Run on an emulator
Create a device
-
Open the Device Manager

-
Open Create a new Hardware Profile
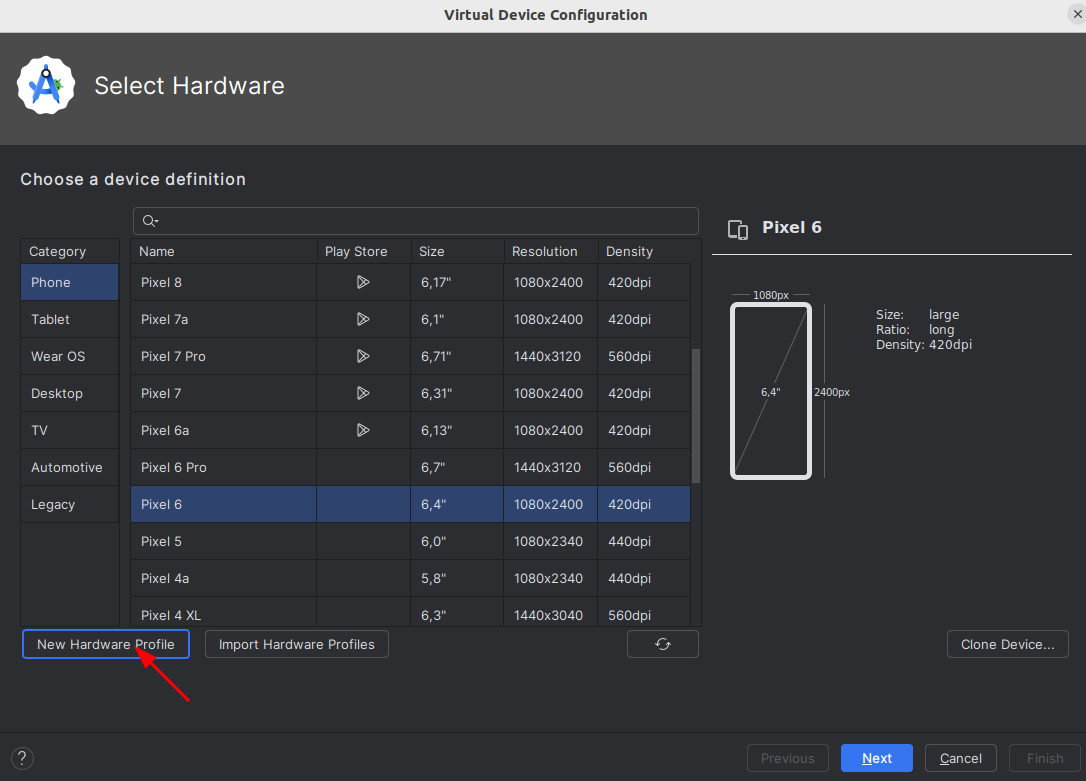
-
Create Galaxy S23 profile
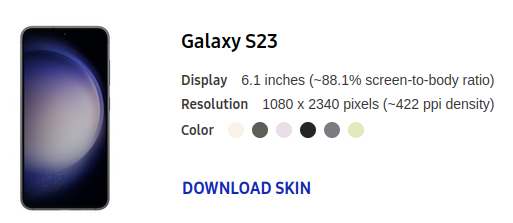
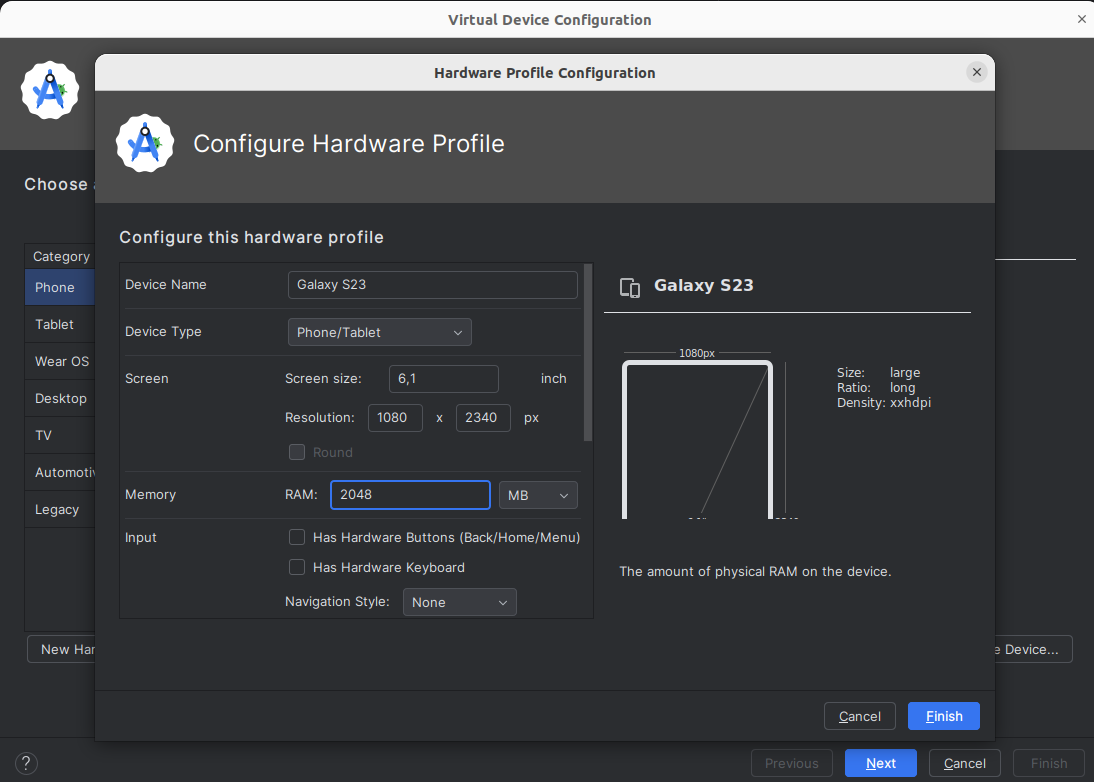 (S23 data comes from Samsung's skin website (see Use a phone skin))
Install Emulator Acceleration
- Install and run
cpu-checker$ sudo apt-get install cpu-checker $ sudo sudo kvm-ok INFO: /dev/kvm exists KVM acceleration can be used $ sudo apt-get remove cpu-checker - Install KVM
sudo apt-get install qemu-kvm libvirt-daemon-system libvirt-clients bridge-utils - verify with
$ ~/DEV/Android_Studio/android/sdk/emulator/emulator -accel-check
INFO    | Storing crashdata in: /tmp/android-lesaint/emu-crash-35.1.20.db, detection is enabled for process: 711988
accel:
0
KVM (version 12) is installed and usable.
accel
Sources
Run the app
To run the app in Emulator:

- Make sure the device created earlier is selected
- Maks sure
appis selectedappis the name of Gradle submodule that contains the Android App in the Gradle project generated by Android Studio
-
Click on the 'Run' icon
- if the icon is disabled, make sure the Gradle configuration is synchronized. If so you may be seeing this banner. Click on
Sync.

- if the icon is disabled, make sure the Gradle configuration is synchronized. If so you may be seeing this banner. Click on
-
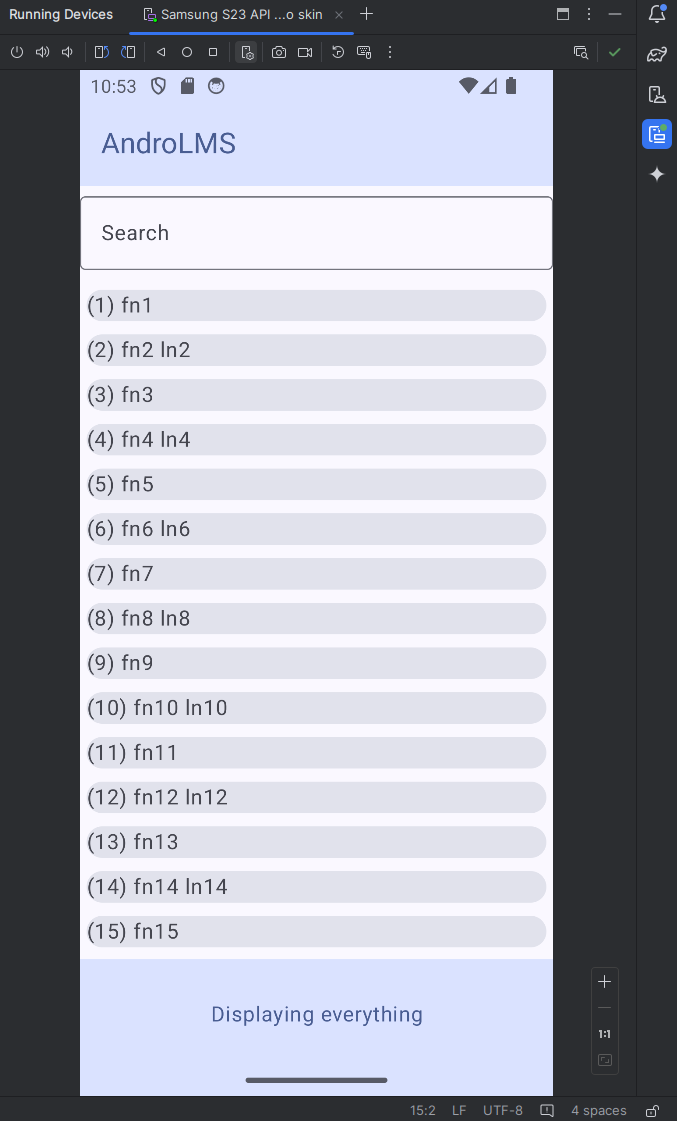
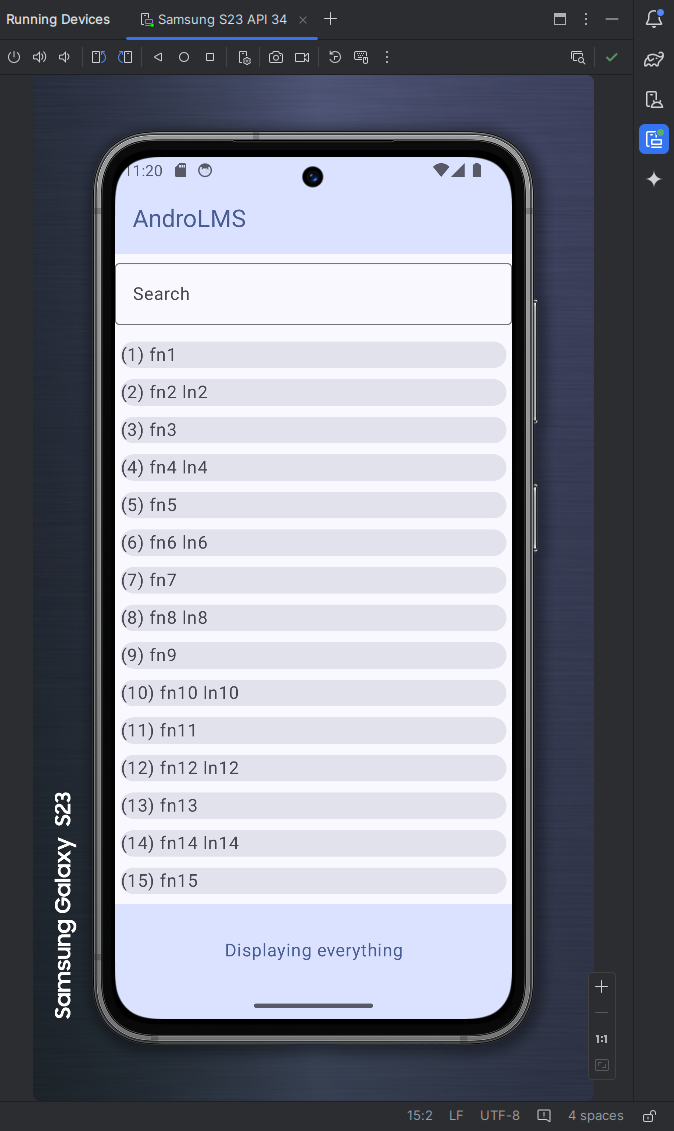
The emulated device's screen appears in a panel on the right-hand side of the IDE (screenshot of
AndroLMSMVP UI, not of the generated application)
Stop the emulator
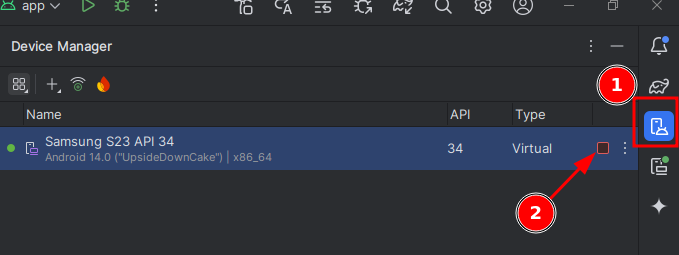
Closing the tab with the device screen is not enough. To make sure the emulator is stopped, go to the Device Manager and click on the square icon.
Use a phone skin
A "skin" can be used to better visualize the application's look on the screen with the device's borders around it and the whole shape of the device.
I googled and found a Samsung page where I can download a skin for the S23, with the specification of the S23's screen.
- Download the skin's zip file from the website to
~/DEV/Android_Studio/android/skin/ - Unzip it
-
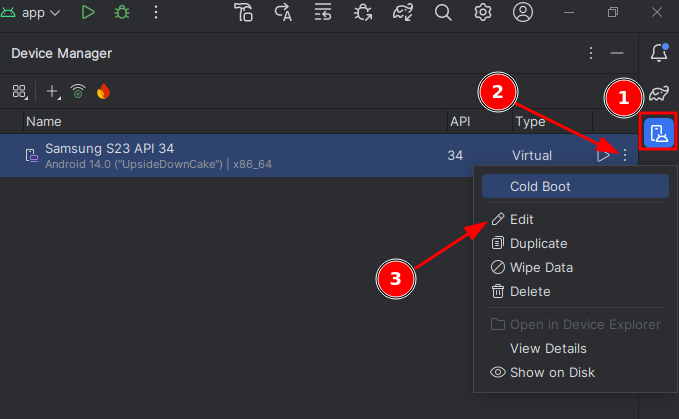
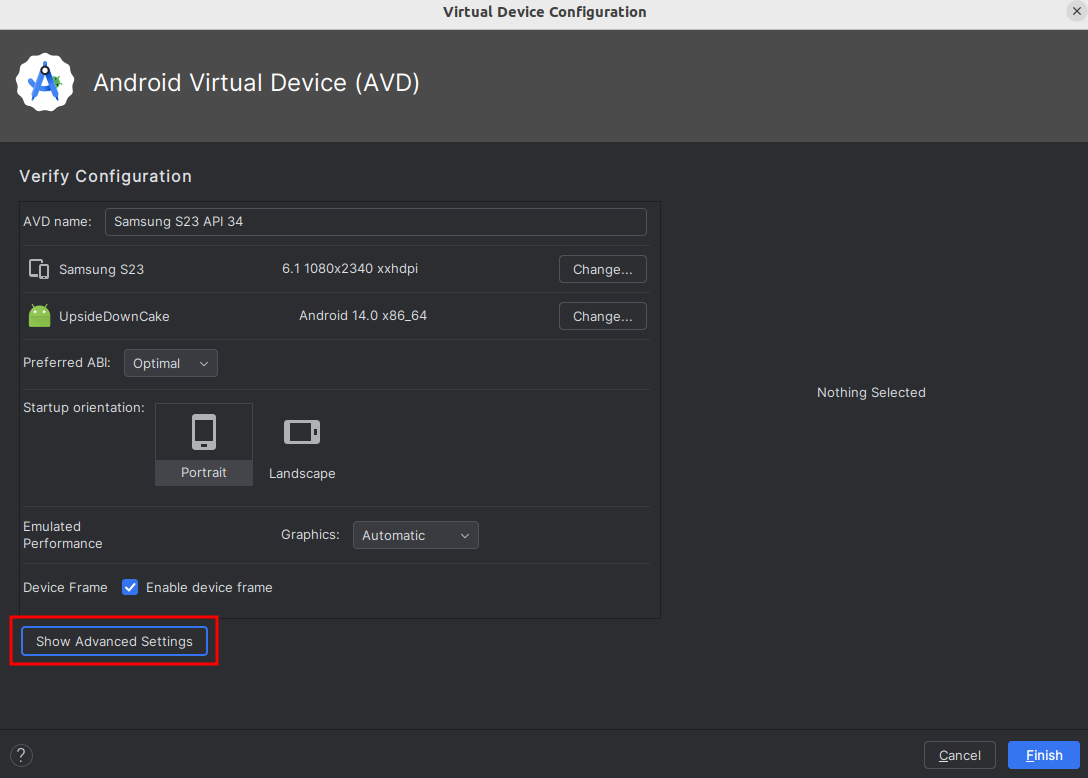
Open the Device Manager and edit the S23 device
-
Display advanced settings
-
Scroll to the very bottom, tick "Enable device frame" and select the directory where the skin is stored
~/DEV/Android_Studio/android/skin/Galaxy_S23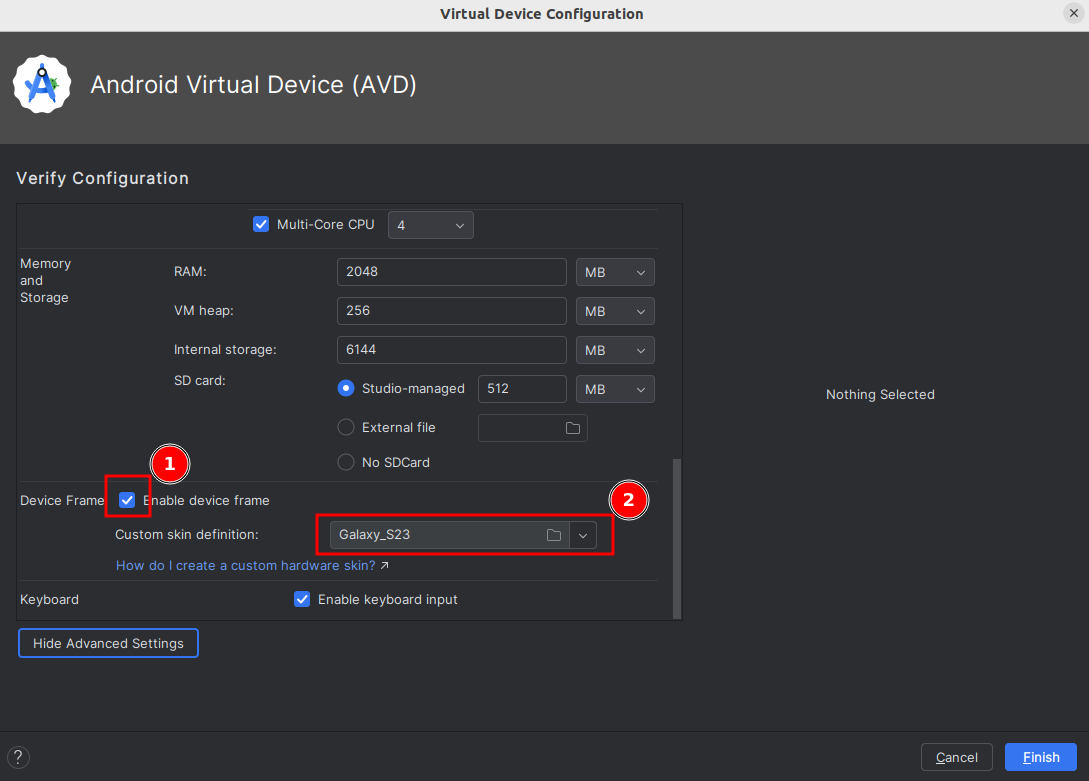
-
Stop the emulator (see Stop the emulator) and run the app again (see Run the app)
Note
Samsung documentation advises unchecking "Launch in the Running Devices tool window" to launch Android Emulator as a standalone application and ensure correct rendering of the skin.
I initially followed this advise, which opened the emulator in a new window rather than in a tab, but reverted as I noticed the skin rendered correctly.
Sources